Static Model via COLLADA
This tutorial shows how to get a static model from Blender to OpenMW using the COLLADA format. It does not cover using Blender itself, as there are many better resources for that. The focus is solely on the pipeline and its specific requirements. Static models are those that don’t have any animations included in the exported file.
Requirements
To use the Blender to OpenMW pipeline via COLLADA, you will need the following.
- OpenMW 0.47 or later
- Blender 2.83 or later. Latest confirmed, working version is Blender 3.0
- OpenMW COLLADA Exporter
- A model you would like to export. In our case, it’s a barrel.
The Barrel
The barrel shown in this tutorial, and its revelant files, are available from the Example Suite repository. This should be useful for further study of how to set up a static prop in case the tutorial is not clear on any particular thing.

data/meshes/the_barrel.dae– exported modeldata/textures/the_barrel.dds– diffuse texturedata/textures/the_barrel_n.dds– normal mapdata/textures/the_barrel_spec.dds– specular mapsource_assets/the_barrel.blend– source file configured as this tutorial specifies
Location, Rotation, Scale
First, let’s take a look at how the fundamental properties of a scene in Blender translate to a COLLADA model suitable for use in OpenMW. These apply the same to static and animated models.
Location
Objects keep their visual location and origin they had in the original scene.
Rotation
- Blender’s +Z axis is up axis in OpenMW
- Blender’s +Y axis is front axis in OpenMW
- Blender’s X axis is left-right axis in OpenMW
Scale
Scale ratio between Blender and OpenMW is 70 to 1. This means 70 units in Blender translate to 1 m in OpenMW.
However, a scale factor like this is impractical to work with. A better approach is to work with a scale of 1 Blender unit = 1 m and apply the 70 scale factor at export. The exporter will automatically scale all object, mesh, armature and animation data.
Materials
OpenMW uses the classic, specular material setup and currently doesn’t support
the more mainstream PBR way.
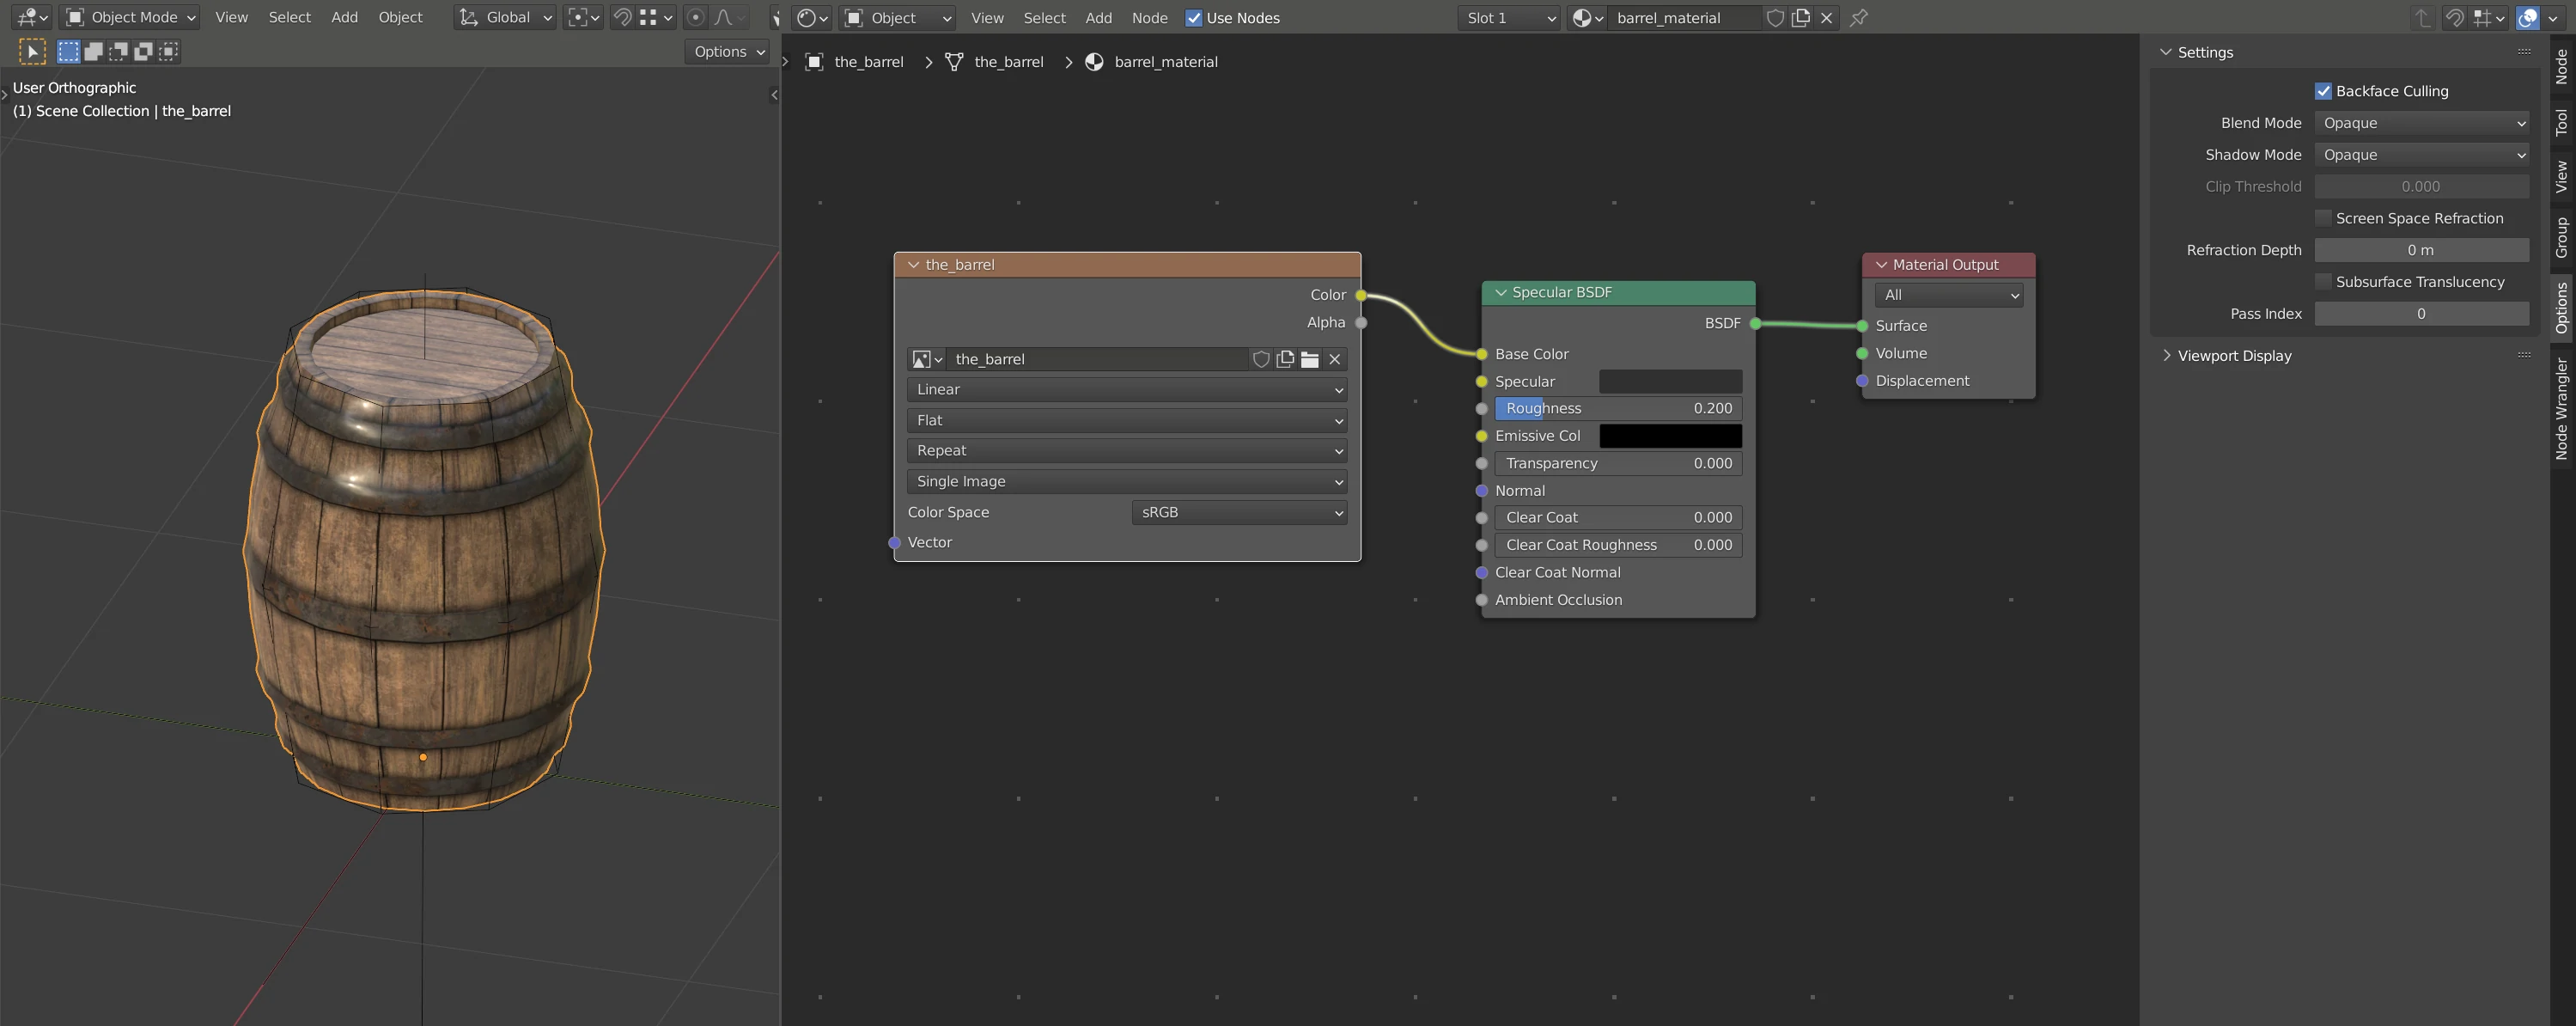
The COLLADA exporter takes values from Specular BSDF node of the material
assigned to the mesh. In case no node or material is assigned, a default white
material is exported. The following list presents material values in the
exported COLLADA file and what value in Blender affect them.
Diffuse
Diffuse value is taken from Base Color of the Specular BSDF node. To get
visually matching results between Blender and OpenMW, set Blender’s Color
Management Display Device to None.
Specular
Specular value is taken from Specular of the Specular BSDF node.
Ambient
Ambient value is taken from the World Background Color of Blender’s
currently active world. The value is found in the World Properties tab,
Surface panel, when the world is not using nodes.
Emission
Emission value is taken from Emissive Color of the Specular BSDF node.
Double-sided
This is controlled by the Backface Culling toggle found under material
options. When Backface culling is enabled, the material will be exported as
single-sided.
Shininess
Shininess value is taken from Roughness of the Specular BSDF node. Shininess
and Roughness refer to the same material property but use an opposite scale. The
higher the roughness, the lower the shininess.
Transparency (alpha blend)
Blend transparency is used when Blend Mode of the material in Blender is set
to Alpha Blend. The setting is found under material options. Amount of
transparency is then controlled by Transparency of the Specular BSDF node.
Transparency (alpha clip)
Alpha clip transparency is used when Blend Mode of the material in Blender
is set to Alpha Clip. In OpenMW, transparency values are taken from the
alpha channel of the diffuse texture. When previewing diffuse texture’s alpha
channel, be mindful that Blender uses an inverted scale for transparency
compared to OpenMW.
Textures
For textures, a diffuse texture needs to be connected to the Base Color
socket of the Specular BSDF node. This is enough for the material to be included
in the exported COLLADA file.

Additional texture types, such as specular or normal maps, are used
when enabled in the OpenMW Launcher with the Auto use object normal maps
and Auto use object specular maps options. The textures need to follow the
name of the diffuse texture with an additional suffix, and be in the same
folder. OpenMW will then automatically recognize and use these textures. In the
case of the barrel, the textures are named:
the_barrel.dds- diffuse texturethe_barrel_n.dds- normal mapthe_barrel_spec.dds- specular map
Texture Paths
Textures will show properly in OpenMW when the path in the exported COLLADA file
is as follows textures/the_barrel.dds. The exporter detects the
data/textures part of the texture’s path in Blender and truncates the rest.
The texture path can also be set manually in the exported COLLADA file.
Textures Not Visible
If a texture doesn’t show on the exported model in OpenMW-CS or in-game, it’s likely
the file path to the texture is incorrect and OpenMW can’t find it.
To fix this you can open the exported .dae file in a text editor and check
the texture’s filepath. In the example of this barrel model it’s found on lines 13-17.
<library_images>
    <image id="id-image-4" name="the_barrel">
        <init_from>textures/the_barrel.dds</init_from>
    </image>
</library_images>
A path to a texture must always start with textures/ and then continues with
whatever subfolders the texture is in. It’s a common issue that the path can start
with ../textures/ in which case you can manually remove the ../
and the textures should then show.
Collision Shapes
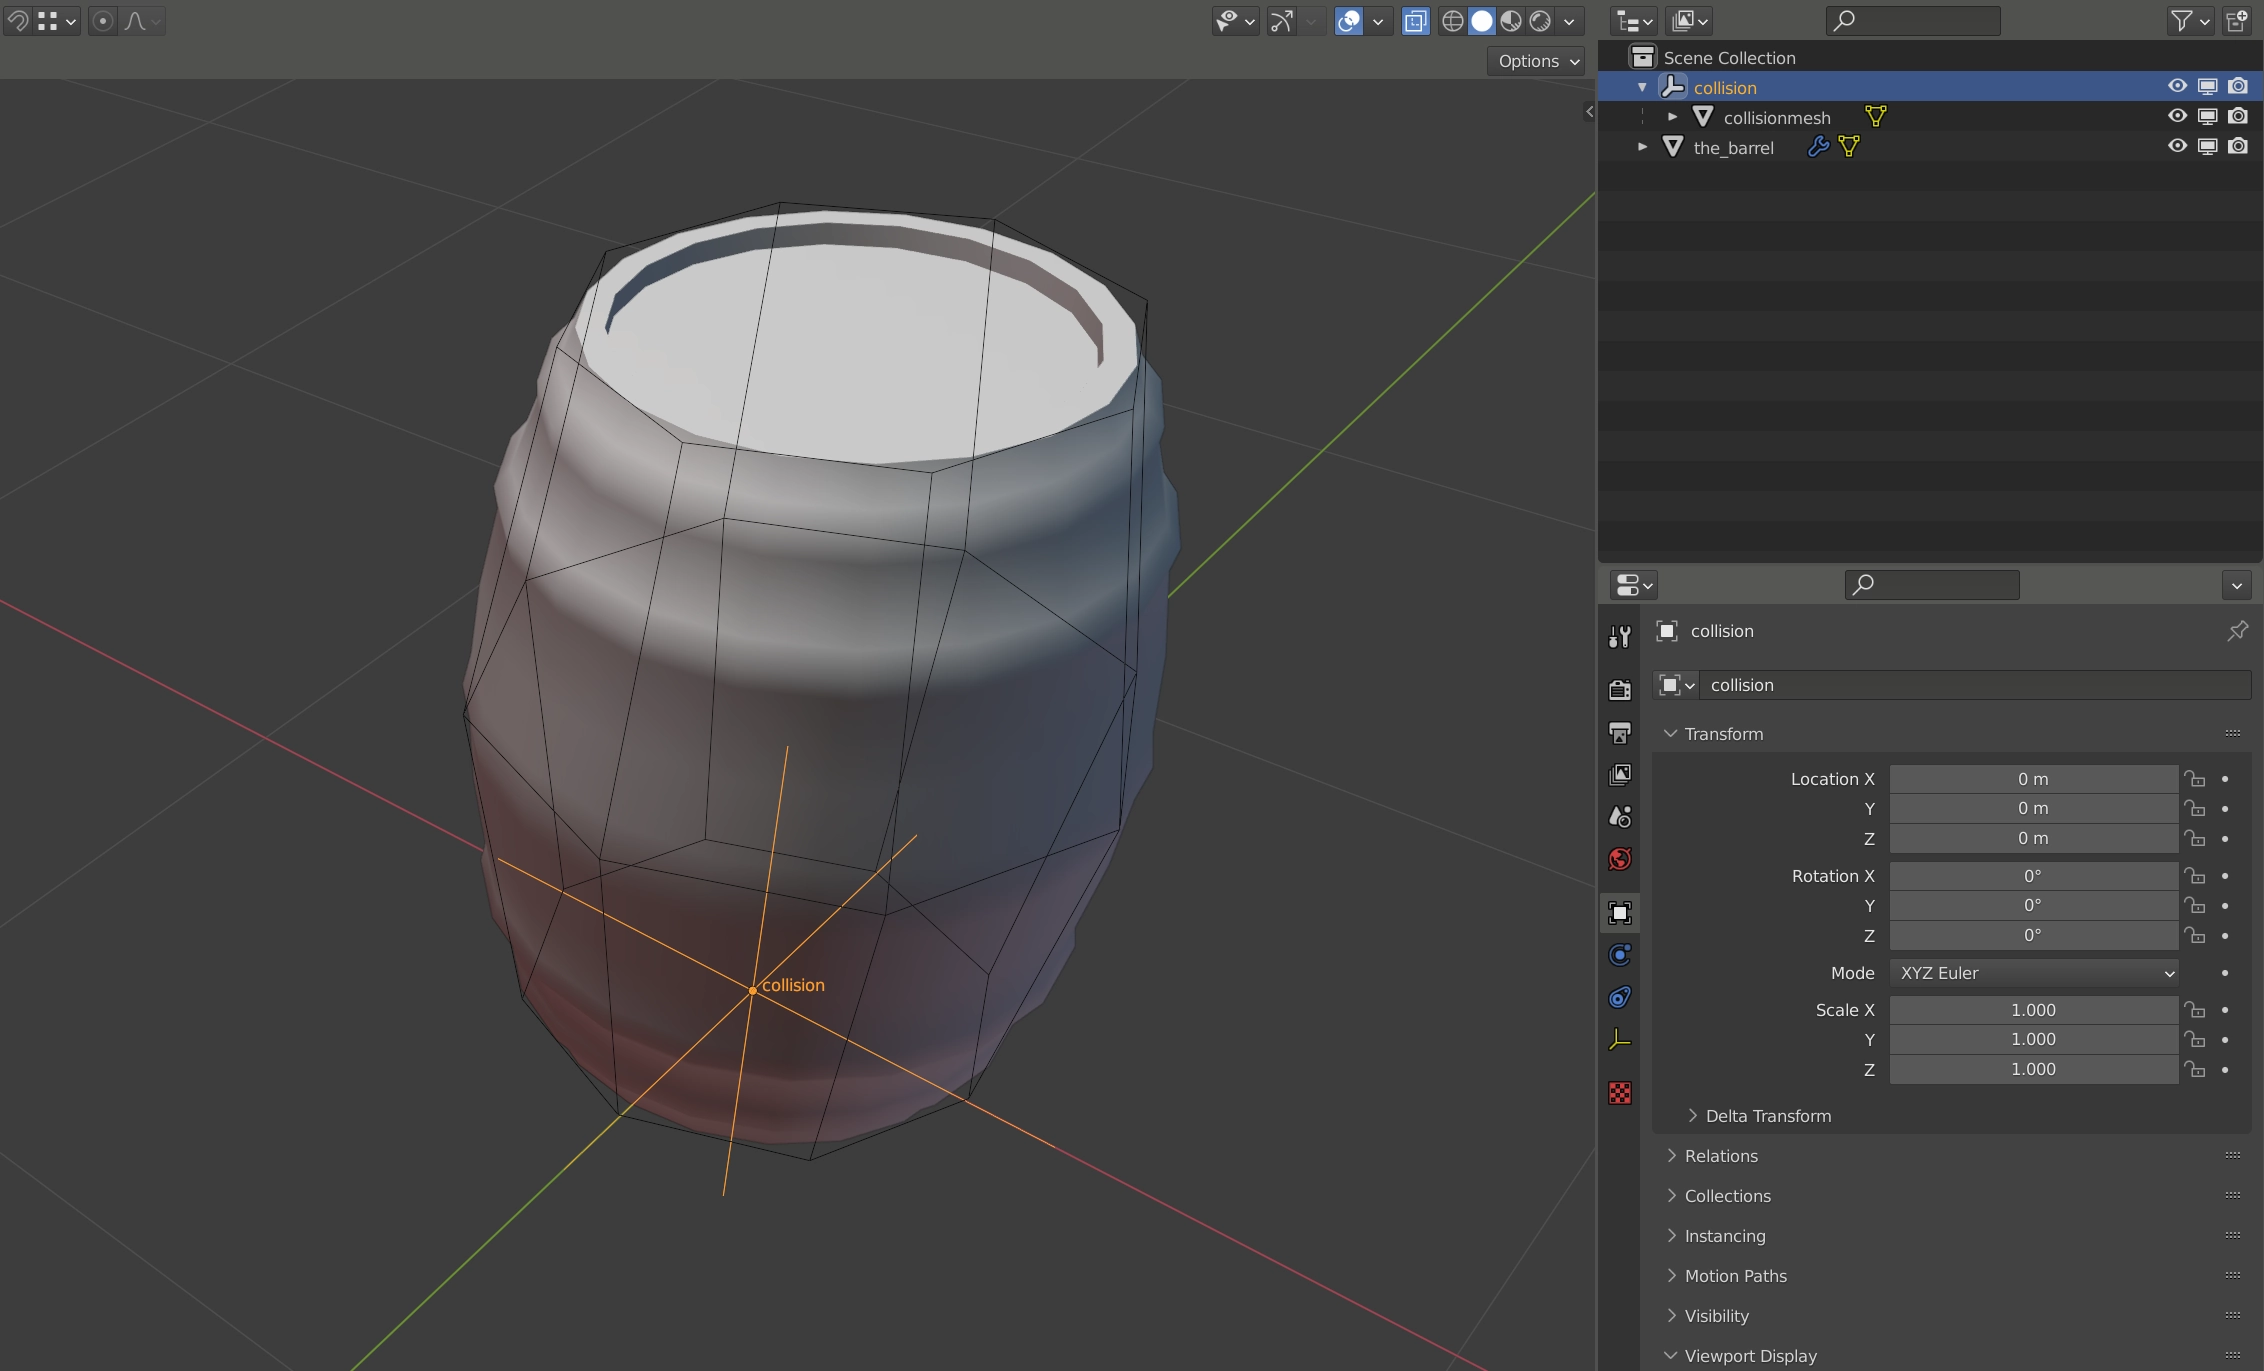
In Blender, a custom collision shape is set up with an empty named
Collision or collision. Any mesh that is a child of this empty will be
used for physics collision and will not be visible in-game. There can be
multiple child meshes under collision and they will all contribute to the
collision shapes. The meshes themselves can have an arbitrary name, it’s only
the name of the empty that is important. The tcb command in OpenMW’s in-game
console will make the collision shapes visible and you will be able to inspect
them.

If no custom collision shape is present, OpenMW will use the regular mesh itself, which is not optimal and should be avoided.
Exporter Settings
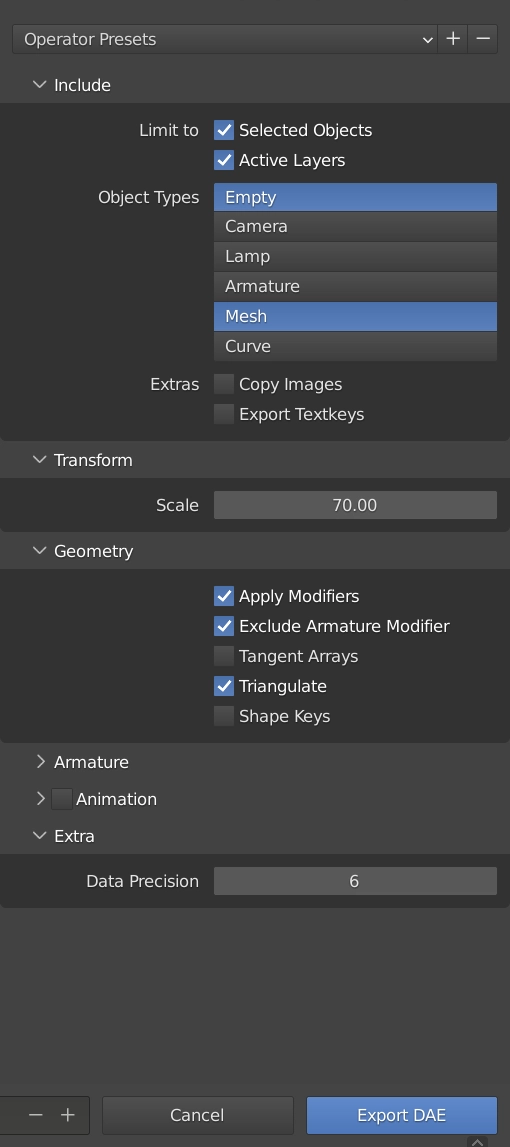
For static models, use the following exporter settings. Before export, select all objects you wish to include in the exported file and have the “Selected Objects” option enabled. Without this, the exporter could fail.

Getting the Model in-game
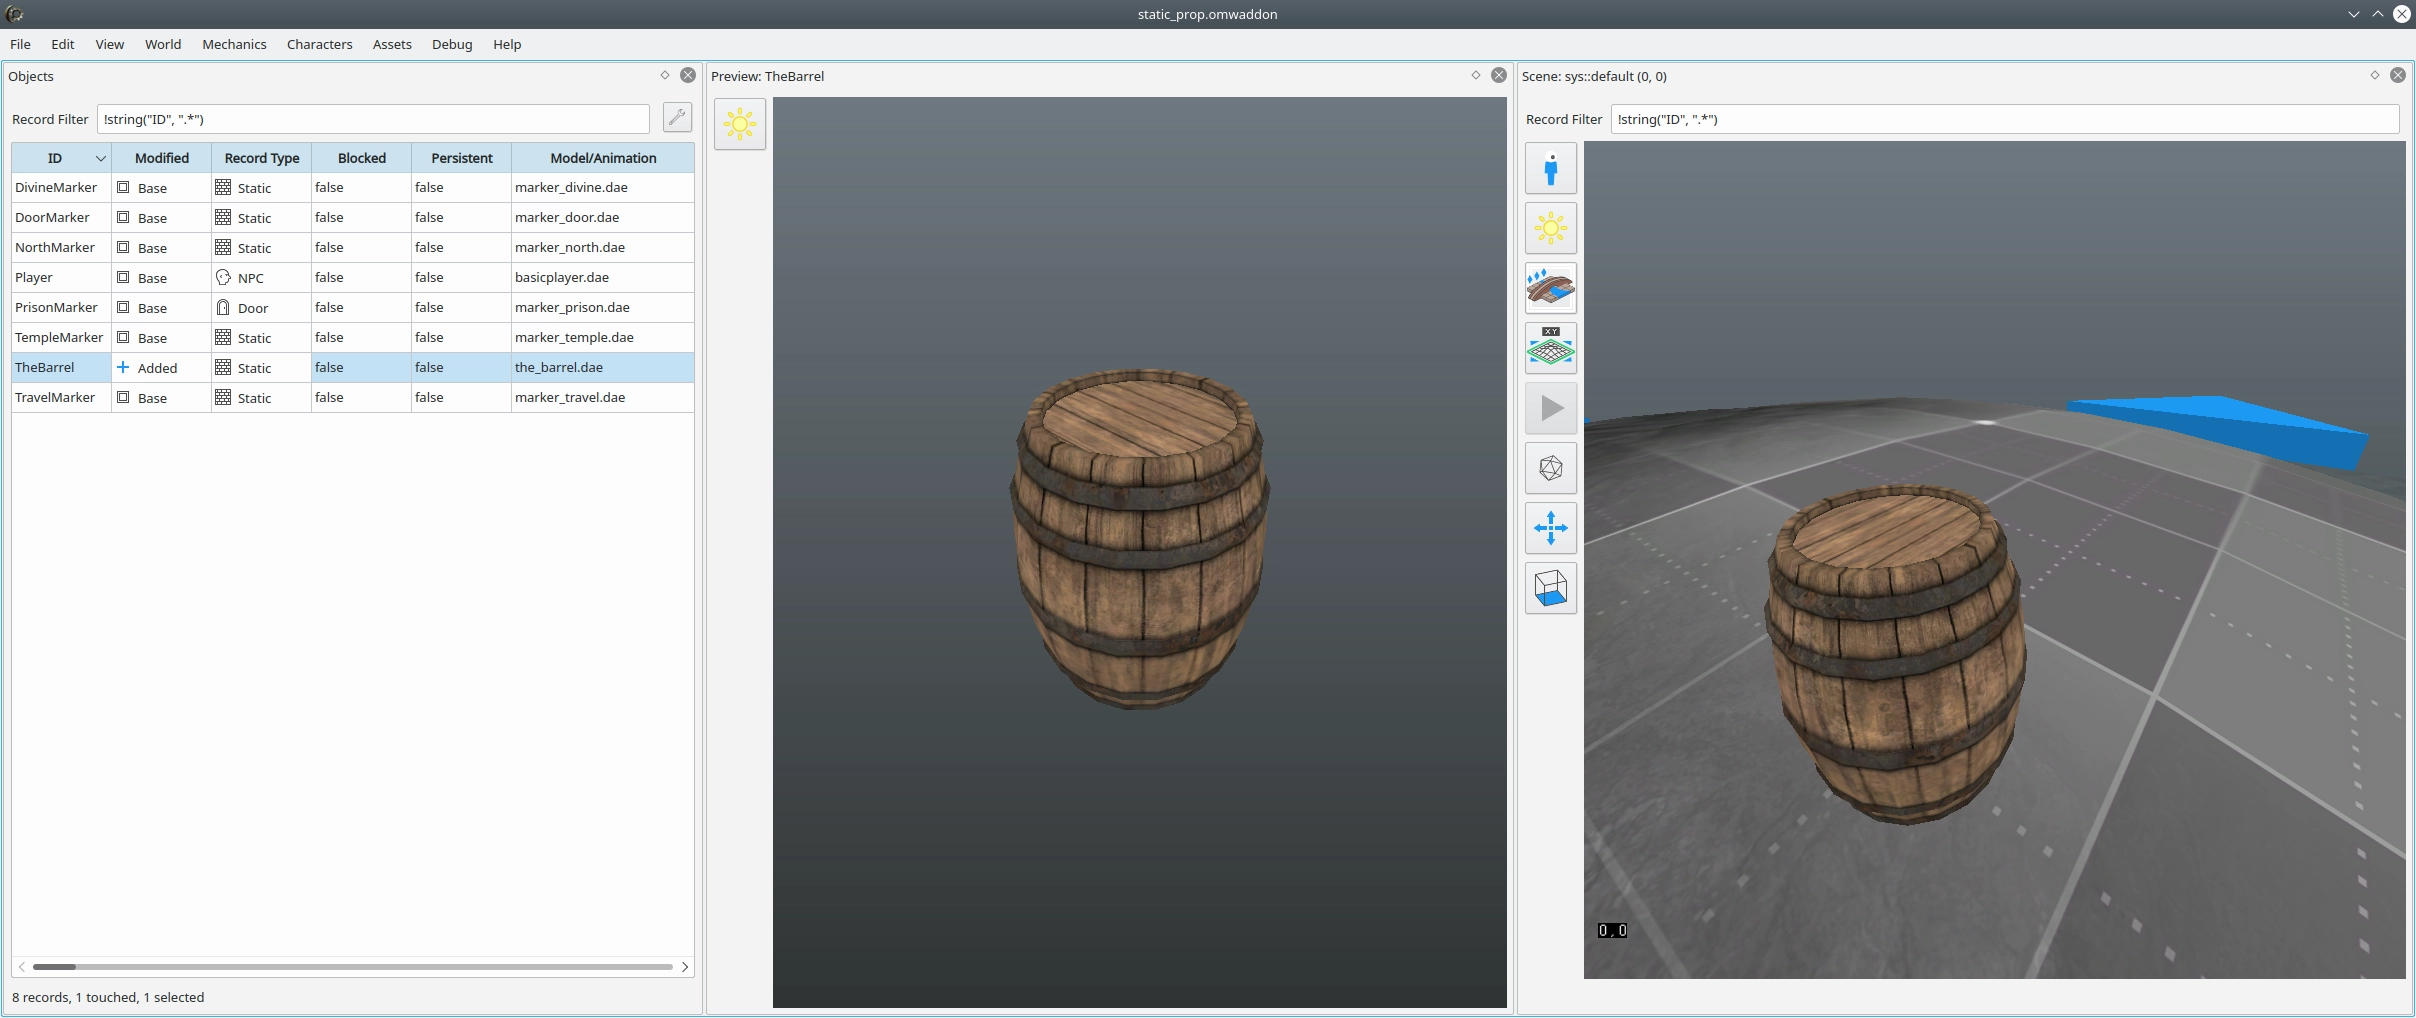
Once the model is exported, it needs to be placed in the correct folder where OpenMW will read it. In OpenMW-CS it can then be assigned to an object and added to a world cell.
