A Tour through OpenMW CS: making a magic ring
In this first chapter we will create a mod that adds a new ring with a simple enchantment to the game. The ring will give its wearer a permanent Night Vision effect while being worn. You don’t need prior knowledge about modding Morrowind, but you should be familiar with the game itself. There will be no scripting necessary, we chan achieve everything using just what the base game offers out of the box. Before continuing make sure that OpenMW is properly installed and playable.
Adding the ring to the game’s records
In this first section we will define what our new ring is, what it looks like and what it does. Getting it to work is the first step before we go further.
Starting up OpenMW CS
We will start by launching OpenMW CS, the location of the program depends on your operating system. You will be presented with a dialogue with three options: create a new game, create a new addon, edit a content file.
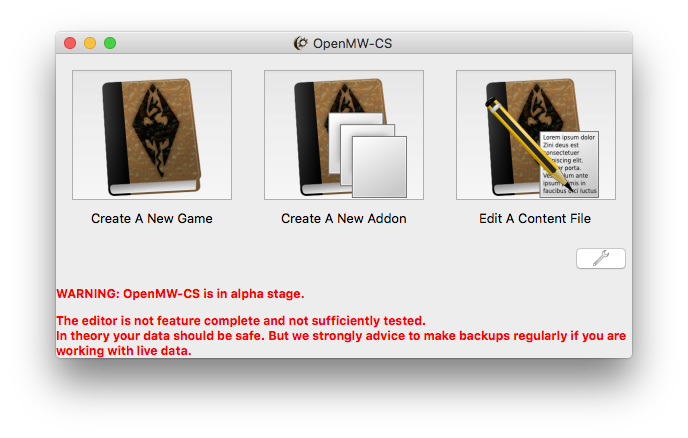
The first option is for creating an entirely new game, that’s not what we want. We want to edit an existing game, so choose the second one. When you save your addon you can use the third option to open it again.
You will be presented with another window where you get to chose the content to edit and the name of your project. We have to chose at least a base game, and optionally a number of other addons we want to depend on. The name of the project is arbitrary, it will be used to identify the addon later in the OpenMW launcher.
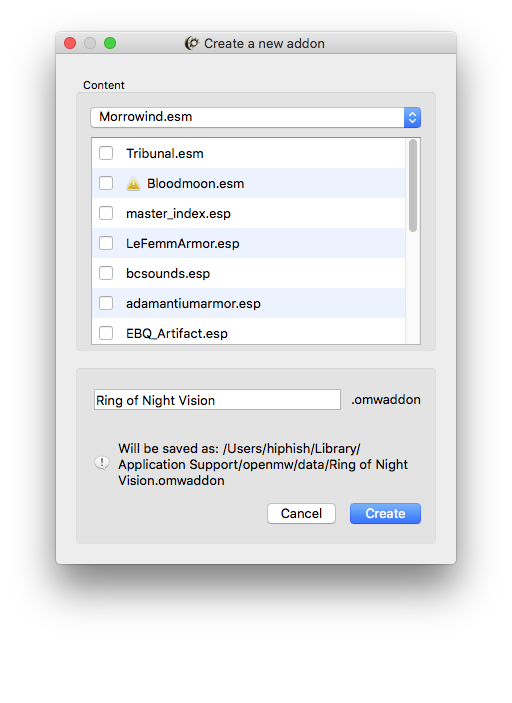
Choose Morrowind as your content file and enter Ring of Night Vision as the name. We could also chose further content files as dependencies if we wanted to, but for this mod the base game is enough.
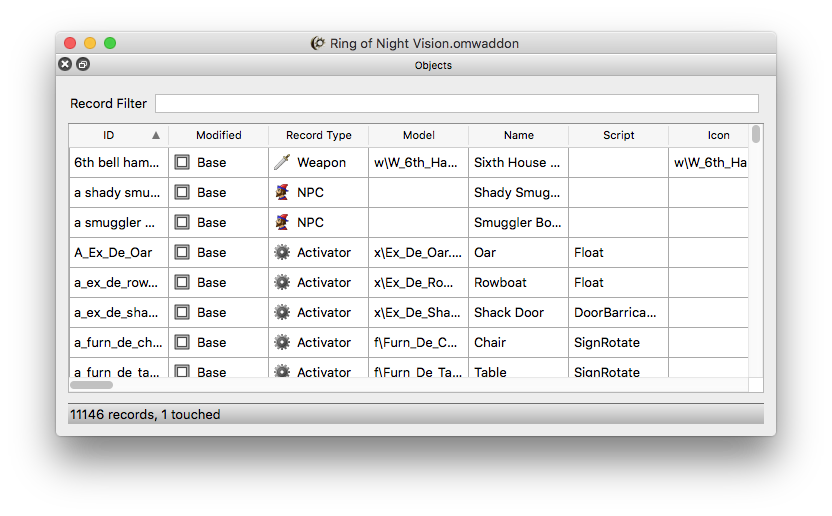
Once the addon has been created you will be presented with a table. If you see a blank window rather than a table choose World → Objects from the menu.
Let’s talk about the interface for a second. Every window in OpenMW CS has panels, these are often but not always tables. You can close a panel by clicking the small “X” on the title bar of the panel, or you can detach it by either dragging the title bar or clicking the icon with the two windows. A detached panel can be re-attached to a window by dragging it by the title bar on top of the window.
Now let’s look at the panel itself: we have a filter text field, a very large table and a status bar. The filter will be very useful when we want to find an entry in the table, but for now it is irrelevant. The table you are looking at contains all objects in the game, these can be items, NPCs, creatures, whatever. Every object is an entry in that table, visible as a row. The columns of the table are the attributes of each object.
Morrowind uses something called a relational database for game data. If you are not familiar with the term, it means that every type of thing can be expressed as a table: there is a table for objects, a table for enchantments, a table for icons, one for meshes, and so on. Properties of an entry must be simple values, like numbers or text strings. If we want a more complicated property we need to reference an entry from another table. There are a few exceptions to this though, some tables do have subtables. The effects of enchantments are one of those exceptions.
Defining a new record
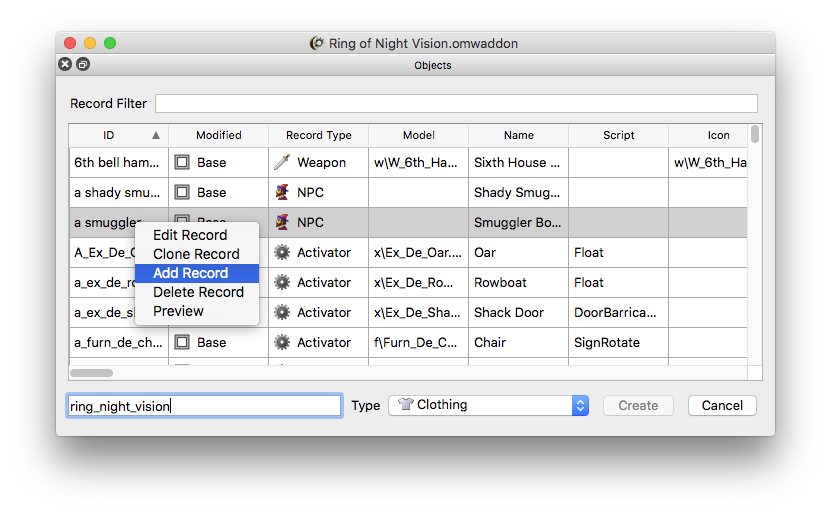
Enough talk, let’s create the new ring now. Right-click anywhere in the objects table, choose Add Record and the status bar will change into an input field. We need to enter an ID (short for identifier) and pick the type. The identifier is a unique name by which the ring can later be identified; I have chosen ring_night_vision. For the type choose Clothing.
The table should jump right to our newly created record, if not read further below how to use filters to find a record by ID. Notice that the Modified column now shows that this record is new. Records can also be Base (unmodified), Modified and Deleted. The other fields are still empty since we created this record from nothing. We can double-click a table cell while holding Shift to edit it (this is a configurable shortcut), but there is a better way: right-click the row of our new record and chose Edit Record, a new panel will open.
We can right-click the row of our new record and chose Edit Record, a new panel will open. Alternatively we can also define a configurable shortcut instead of using the context menu; the default is double-clicking while holding down the shift key.
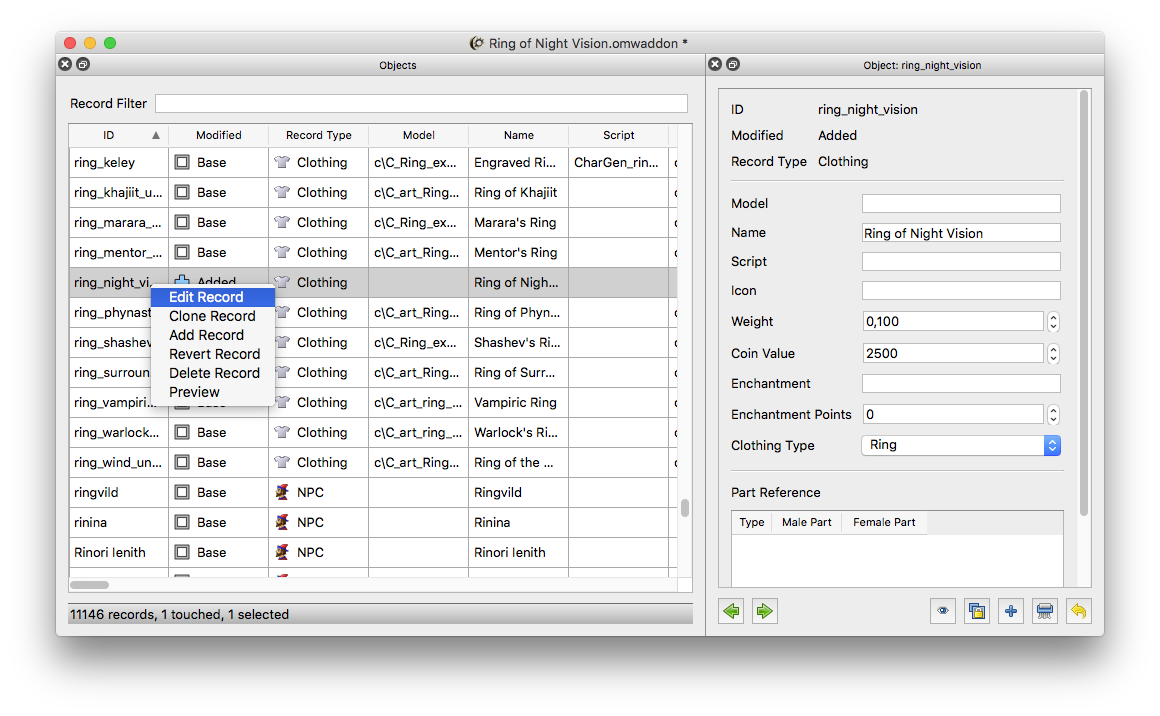
You can set the name, weight and coin value as you like, I chose Ring of Night Vision, 0.1 and 2500 respectively. Make sure you set the Clothing Type to Ring. We could set the other properties manually as well, but unless you have an exceptional memory for identifiers and never make typos that’s not feasible. What we are going to do instead is find the records we want in their respective tables and assign them from there.
Finding records using filters
We will add an icon first. Open the Icons table the same way you opened the Objects table: in the menu click Assets → Icons. If the window gets too crowded remember that you can detach panels. The table is huge and not every ring icon starts with “ring”, so we have to use filters to find what we want.
Filters are a central element of OpenMW CS and a major departure from how the original Morrowind CS was used. In fact, filters are so important that they have their own table as well. We won’t be going that far for now though. There are three types of filters: Project filters are part of the project and are stored in the project file, session filter are only valid until you exit the CS, and finally instant filter which are used only once and typed directly into the Filter field.
For this tutorial we will only use instant filters. We type the definition of the filter directly into the filter field rather than the name of an existing filter. To signify that we are using an instant filter the have to use ! as the first character. Type the following into the field:
!string("id", ".*ring.*")
A filter is defined by a number of queries which can be logically linked. For now all that matters is that the string(<property>, <pattern>) query will check whether <propery> matches <pattern>. The pattern is a regular expression, if you don’t know about them you should learn their syntax. For now all that matters is that . stands for any character and * stands for any amount, even zero. In other words, we are looking for all entries which have an ID that contains the word “ring” somewhere in it. This is a pretty dumb pattern because it will also match words like “ringmail”, but it’s good enough for now.
If you have typed the filter definition properly the text should change from red to black and our table will be narrowed down a lot. Browse for an icon you like and drag & drop its table row onto the Icon field of our new ring.
That’s it, you have now assigned a reference to an entry in another table to the ring entry in the Objects table. Repeat the same process for the 3D model, you can find the Meshes table under Assets → Meshes.
Adding the enchantment
Putting everything you have learned so far to practice we can add the final and most important part to our new ring: the enchantment. You know enough to perform the following steps without guidance: Open the Enchantments table (Mechanics → Enchantments) and create a new entry with the ID Cats Eye. Edit it so that it has Constant Effect enchantment type.
To add an effect to the enchantment right-click the Magic Effects table and choose Add new row. You can edit the effects by right-clicking their table cells. Set the effect to NightEye, range to Self, and both magnitudes to 50. The other properties are irrelevant.
Once you are done add the new enchantment to our ring. That’s it, we now have a complete enchanted ring to play with. Let’s take it for a test ride.
Playing your new addon
Launch OpenMW and in the launcher under Data Files check your addon. Load a game and open the console. We have only defined the ring, but we haven’t placed any instance of it anywhere in the game world, so we have to create one. In the console type:
player->AddItem "ring_night_vision" 1
The part in quotation marks is the ID of our ring, you have to adjust it if you chose a different ID. Exit the console and you should find a new ring in your inventory. Equip it and you will instantly receive the Night Vision effect for your character.
Conclusion
In this tutorial we have learned how to create a new addon, what tables are and how to create new records. We have also taken a very brief glimpse at the syntax of filters, a feature you will be using a lot when creating larger mods.
This mod is a pure addition, it does not change any of the existing records. However, if you want to actually present appealing content to the player rather than just offering abstract definitions you will have to change the game’s content. In the next tutorial we will learn how to place the ring in the game world so the player can find it legitimately.
Adding the ring to the game’s world
Now that we have defined the ring it is time add it to the game world so the player can find it legitimately. We will add the ring to a merchant, place it in a chest and put it somewhere in plain sight. To this end we will have to actually modify the contents of the game.